Indoor Rock Climbing for Beginners: A Complete Guide to Getting Started in 2024
Indoor rock climbing for beginners has exploded in popularity, with a staggering 65% surge since its Olympic debut in 2021. As someone who has been teaching new climbers for years, I can tell you there’s never been a better time to start! I’ve watched complete beginners transform from nervous first-timers to confident climbers, all while building incredible strength and overcoming their fears.
Just last week, I watched Sarah, one of my super nervous adult students, crush her first climbing route. She went from shaking at the sight of the wall to confidently planning her moves like a pro! That’s what I love about this sport – you don’t need to be a fitness guru or an adrenaline junkie to get started. Hundreds of complete beginners transform from “I can’t do this!” to “Watch me send this route!” Trust me; watching their faces light up when they reach the top for the first time never gets old.
Let me share what I’ve learned about getting started with indoor rock climbing for beginners – because, honestly, there’s never been a better time to jump in. Whether you’re looking to overcome your fear of heights (been there!), build some serious strength, or just try something new, I’ve got your back!
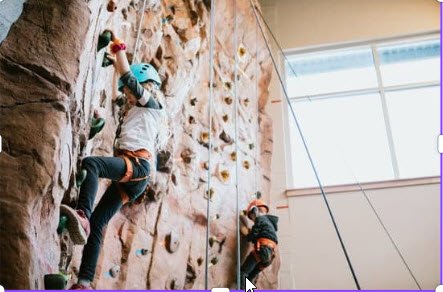
Essential Indoor Climbing Gear for Beginners
Let me tell you when I first walked into a climbing gym back in my early days as an instructor; I was completely overwhelmed by all the gear hanging on the walls. I remember thinking, “Do I need all this stuff?” The answer is yes and no, and I will break it down for you in a way I wish someone had done for me.
First things first – don’t go crazy buying everything in sight! I learned this lesson the hard way when I dropped $500 on gear my first week, only to realize I didn’t even know if I’d stick with climbing. Here’s what I tell all my beginner students now: start with rentals. Most gyms charge around $5-8 for shoes and harness rentals, and it’s worth it for your first 5-8 sessions.
Let me share a painful memory of shoes (and this is where it gets really important). I once bought aggressive, downturned climbing shoes because they looked “cool” – big mistake! I could barely walk in them, let alone climb effectively. As a beginner, you need a pair of neutral, flat-soled climbing shoes. La Sportiva Tarantulace or Scarpa Origin are my go-to recommendations for newbies, usually running about $90-100.
Here’s a pro tip about shoe fitting that took me years to figure out: try them on in the afternoon when your feet are slightly swollen. Your climbing shoes should feel snug but not painful – you want your toes to be flat, not scrunched. Trust me, nobody climbs well when their feet are screaming in pain!
Now, let’s talk about the absolute must-haves for safety. A harness is your lifeline when climbing, and this is NOT the place to pinch pennies. I recommend the Black Diamond Momentum or Petzl Corax for beginners – both around $60-80. They’re comfortable enough for long sessions but won’t break the bank. Ensure it fits snugly around your waist above your hip bones, and you can’t pull the leg loops past your thighs.
One thing that surprised me when I started was how essential chalk is! Your hands get sweaty quickly when you’re climbing, and that’s a recipe for disaster. A basic chalk bag (around $15-20) and some loose chalk ($10) will make a difference. I learned this when I kept slipping off easy routes because my hands were too sweaty!
For those wondering about a realistic budget, here’s what I tell my students to plan for:
- Starting phase (first month): Stick to rentals (~$30/month)
- First purchase (month 2-3): Your own shoes ($90-100)
- Second phase (month 3-4): Harness and chalk setup ($85-100)
- Total initial investment: Around $175-200

The cool thing about climbing gear is that once you have these basics, you’re set for quite a while. Just don’t make the mistake I did of buying a crash pad ($200+) before you even know if you like bouldering!
One last piece of advice that I wish I’d gotten early on is never, ever buy used safety gear. I don’t care how good the deal is—you don’t know the history of that harness or those carabiners. Your life depends on this equipment, so this isn’t the place to try to save a few bucks.
The good news? Most climbing gyms have knowledgeable staff to help you try on gear and ensure everything fits properly. Don’t be shy about asking questions – we’ve all been beginners, and most climbers are excited to help newcomers get started safely. Remember to take it slow with gear purchases; focus on the essentials first, and you’ll be crushing routes before you know it!
Remember what I always tell my students: “The best gear in the world won’t make you a better climber, but the wrong gear can make you a worse one!” Start with the basics, learn proper technique, add gear as you progress, and understand what you need.
Understanding Indoor Climbing Safety Basics
Let me tell you a story that still makes my palms sweat. During my first year as a climbing instructor, I watched a new climber skip their partner check because they were “in a hurry.” Guess what happened? Their harness wasn’t doubled back properly, and thankfully, another instructor caught it before they left the ground. That moment changed how I teach climbing safety forever.
Look, I get it – all these safety protocols might seem overkill when you’re excited to start climbing. But after teaching thousands of new climbers, I can tell you that these rules aren’t just bureaucratic red tape – they’re life-saving practices that become second nature once you get into the habit.
First, let’s talk about the partner check. In my classes, we use a simple acronym: ABCDE (Anchor, Buckles, Carabiner, Device, End of rope). It takes maybe 30 seconds, but those are the most important seconds of your climbing session. I make it a game with my students—if they can spot something wrong with my intentionally incorrect setup, they get a high five. Trust me, it works!
Regarding harness fitting, here’s something I learned the hard way (thankfully on a low practice wall): your harness should be snug enough that you can’t slip a flat hand between it and your body. The waist belt needs to sit above your hip bones – I’ve seen too many people wear it like a fashion belt around their waist, which is just asking for trouble.
Now, let’s dive into climbing commands. These aren’t just fancy jargon we use to sound cool (okay, maybe a little). They’re crystal-clear communication tools that could save your life. Here’s the primary sequence I teach:
- Climber: “On belay?”
- Belayer: “Belay on!”
- Climber: “Climbing!”
- Belayer: “Climb on!”
Simple, right? But you wouldn’t believe how often I’ve had to stop people who just yell “Ready!” and start climbing. This isn’t a playground – we need clear, specific communication.
Speaking of communication, let’s talk about falling. I still remember my first lead fall – I was terrified! But here’s the thing: knowing how to fall correctly is just as important as knowing how to climb. I teach my students to always drop with soft knees and roll backward for bouldering. I’ve seen too many sprained ankles from people trying to stick their landings like gymnasts.
One of my favorite teaching moments is demonstrating proper spotting technique. You’re not trying to catch the climber—you’re just helping guide them to a safe landing. Keep your hands up and fingers together (I learned that one the painful way), and focus on protecting your head and upper body. I always tell my students, “You’re a steering wheel, not a mattress!”
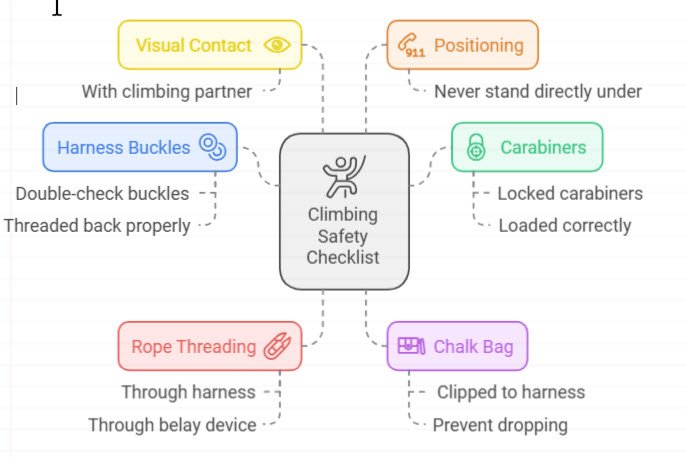
Here’s a safety checklist I make all my students memorize:
- Double-check harness buckles are threaded back properly
- Ensure carabiners are locked and loaded correctly
- Check that the rope is properly threaded through both the harness and belay device
- Always maintain visual contact with your climbing partner
- Never stand directly under someone who’s climbing
- Keep your chalk bag clipped to your harness (you’d be surprised how many people drop these!)
The most important thing I’ve learned in my years of teaching is that safety isn’t just about following rules—it’s about developing a mindset. Every time I climb, even after all these years, I still do my safety checks. It’s like putting on a seatbelt—it should feel weird not to do it.
Remember what I always tell my newbies: “In climbing, we’re not aiming for 99% safety—we’re aiming for 100%. Because that 1% isn’t worth risking.” Take your time with safety checks, communicate clearly, and never be embarrassed to ask questions or double-check something. The climbing community would much rather answer a safety question for the hundredth time than visit someone in the hospital.
And hey, if you ever feel rushed or pressured to skip safety steps, just blame it on your overly cautious climbing instructor (that’s me!). Instead, you use me as an excuse to stay safe rather than end up as one of my “what not to do” teaching examples!
Types of Indoor Rock Climbing for Beginners: Bouldering vs Top Rope
Do you know what I love most about teaching indoor rock climbing? Watching beginners’ faces light up when they find their perfect climbing style. When I started teaching at my local gym, I assumed everyone would prefer top rope climbing because it felt “safer.” But here’s the thing – some of my most nervous beginners fell in love with bouldering instead!
Let’s break down these two main types of indoor rock climbing in a way I wish someone had explained to me when I started. First up: bouldering. Think of it as solving short, robust puzzles with your whole body. You’re climbing without ropes, typically on walls 12-15 feet high, with thick crash pads below. I call it “controlled problem-solving” when explaining it to my newbies. Plus, you don’t need a partner, which is perfect for those spontaneous lunch break climbing sessions!
I’ll never forget watching one of my adult students – a retired teacher terrified of heights – discover her love for bouldering. “It’s like vertical yoga with a dash of problem-solving,” she told me, and honestly? That’s the perfect description! The movements are often powerful and dynamic, but you’re never too far off the ground.
Now, let’s talk about top rope climbing – my personal favorite for teaching complete beginners to indoor rock climbing. This is where you’re tied into a rope that runs through an anchor at the top of the wall, with a partner belaying you from the ground. The look of accomplishment on someone’s face when they first reach the top of a 40-foot wall? Priceless!
Here’s a practical breakdown of what each style offers for beginners:
Bouldering Benefits:
- No ropes or harnesses needed (just shoes and chalk)
- Great for building strength and technique
- Perfect for short training sessions
- More social – easier to climb with groups
- Less intimidating for some beginners

Top Rope Benefits:
- Continuous safety system
- Lets you climb higher walls
- More time on the wall per attempt
- Great for building endurance
- Perfect for working through height anxiety

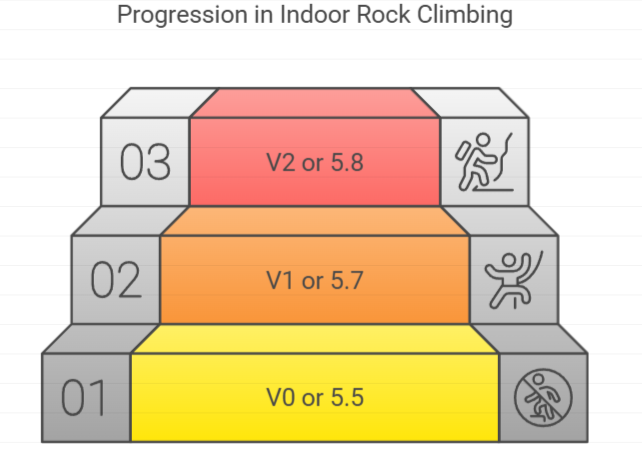
As an instructor, let me share something that surprised me: the climbing grades are different for each style! For bouldering, you’ll see “V” grades (V0-V16, with V0-V2 being beginner-friendly). For top rope routes, most gyms use the Yosemite Decimal System (5.5-5.15, with 5.5-5.8 being perfect for beginners).
Here’s my super practical guide for what these grades actually mean for indoor rock climbing beginners:
- V0 or 5.5: Think ladder-like holds and straight-forward movements
- V1 or 5.7: Starting to require some basic technique
- V2 or 5.8: Now you’re getting into “real” climbing territory
One thing I always tell my new students is to try both styles in their first few sessions! Most climbing gyms offer a “beginner package” that includes both bouldering and top rope areas. You might surprise yourself with what you prefer. I’ve had marathon runners struggle with bouldering but excel at top rope endurance climbs and former gymnasts who took to bouldering like fish to water.
If you’re nervous about heights (like I was), here’s my time-tested advice: start with bouldering. The mental game is more accessible when you’re closer to the ground, and you can take breaks whenever you want without communicating with a partner. Just remember my golden rule: “Always climb down if possible!”
For those who love the idea of reaching higher heights but want to feel super secure, top rope climbing is your best bet. The rope is always there to catch you, and you can rest by sitting back in your harness whenever you need to. One of my adult students called it “vertical meditation,” which I thought was spot-on.
Here’s a pro tip that took me years to figure out: whichever style you choose, start easier than you think you need to. Many beginners burn out in their first 30 minutes because they jumped on something too challenging. Remember what I tell my classes: “Climbing isn’t about getting to the top of one hard thing – it’s about enjoying the journey of many things!”
The real secret to indoor rock climbing for beginners? The “right” style is the one that makes you excited to come back to the gym. There’s no wrong answer, whether that’s bouldering, top rope climbing, or a mix of both. Just promise me one thing: start with the easier grades. We’ve got plenty of time to work up to the hard stuff!
And remember, it’s okay to prefer one style over the other. Some of the best climbers I know only boulder, while others have never touched a boulder problem in their lives. That’s the beauty of indoor rock climbing – there’s truly something for everyone!
Fundamental Climbing Techniques and Movements
If I had a dollar for every time I’ve seen a new climber trying to muscle their way up the wall using just their arms, I could probably buy my own climbing gym! Let me share something that completely changed my perspective when I started teaching: climbing is more about legs and technique than upper body strength.
Let’s start with what I call “the quiet feet game” – something I learned from my first climbing mentor that revolutionized my teaching. Here’s the deal: try climbing while making no noise with your feet. Sounds easy, right? Ha! Most of my students are shocked to discover they’ve been practically stomping their way up the wall. When you place your feet deliberately and quietly, your whole climbing game changes.
When I started, body positioning was my biggest nemesis. I kept hugging the wall like my life depended on it (spoiler alert: it doesn’t!). The key is what we call the “triangle position”—keeping your hips away from the wall and your arms straight. Think about it like this: if you’re pressed against the wall like a starfish, you can’t see your feet, and you’re burning through your arm strength like nobody’s business.
Here’s something that blew my students’ minds during a recent class: your arms should primarily be for balance, not for pulling. I demonstrate this by climbing an easy route using straight arms and focusing on pushing with my legs. The looks on their faces when they realize they’ve been doing it backward are priceless!
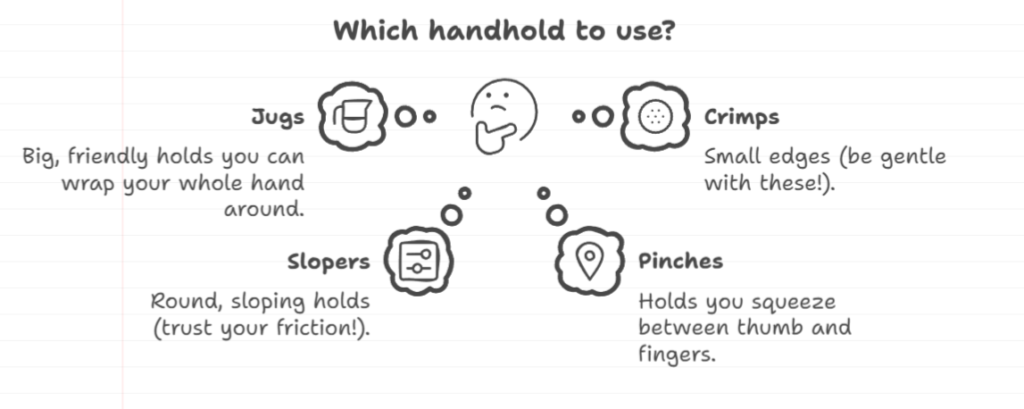
Let’s talk about handholds, because boy, did I get this wrong at first. Here’s a quick breakdown of the main types you’ll encounter:
- Jugs: Big, friendly holds you can wrap your whole hand around
- Crimps: Small edges (be gentle with these!)
- Slopers: Round, sloping holds (trust your friction!)
- Pinches: Holds you squeeze between thumb and fingers
One of my favorite teaching moments is showing students the “silent hands” technique. Instead of grabbing and readjusting frantically, place your hands deliberately the first time. It’s like playing Operation – steady hands win the game!
Now, let’s discuss the real MVP of climbing: your feet. I cannot stress this enough – LOOK AT YOUR FEET when you place them! I make my students say “click” every time they put a foot to ensure they’re watching the placement. Sure, they feel silly at first, but it works like magic.
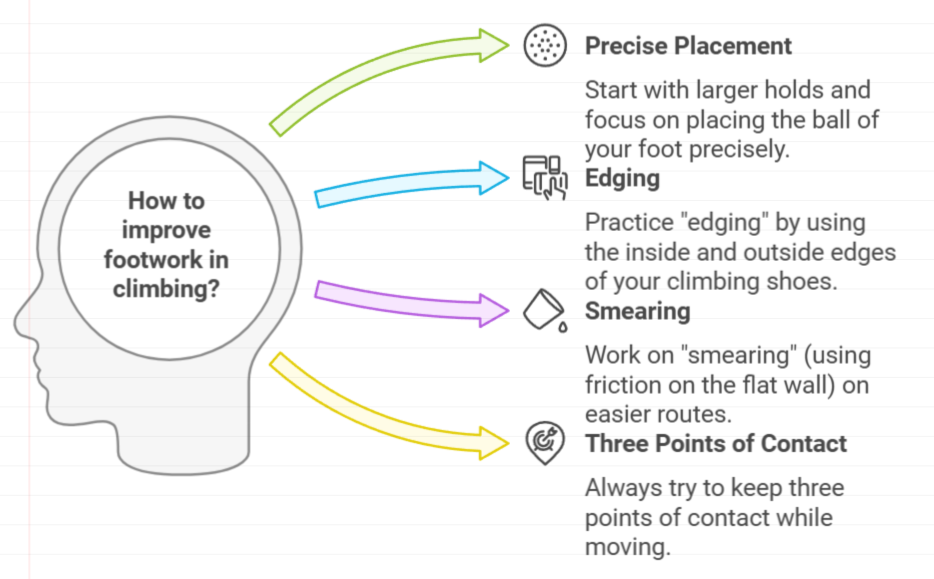
Here’s a footwork practice routine I give all my beginners:
- Start with larger holds and focus on placing the ball of your foot precisely
- Practice “edging” by using the inside and outside edges of your climbing shoes
- Work on “smearing” (using friction on the flat wall) on easier routes
- Always try to keep three points of contact while moving
Weight distribution is where the magic happens. I learned this the hard way after repeatedly peeling off overhanging routes. The secret? Keep your hips over your feet whenever possible. I tell my students to imagine they have a laser pointer on their belt buckle – it should usually be pointing down to their feet, not out into space.
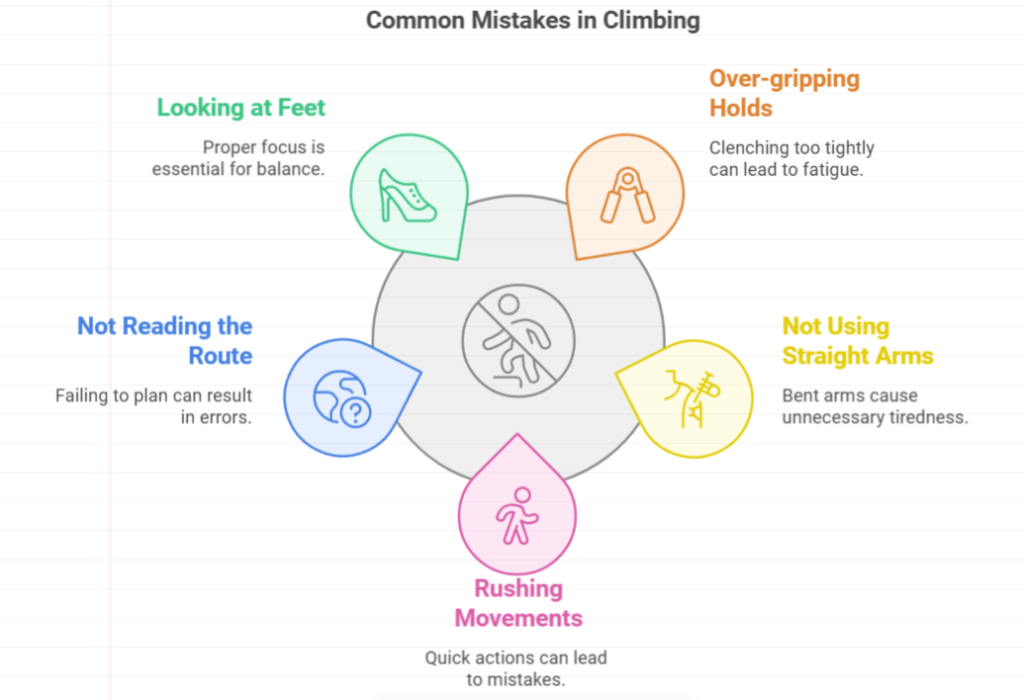
Let me share the most common beginner mistakes I see (and made myself!):
- Over-gripping holds (your hands should be relaxed, not death-gripping)
- Not using straight arms (bent arms = tired arms)
- Rushing movements (slow is smooth, smooth is fast)
- Not reading the route before climbing
- Looking up instead of at their feet
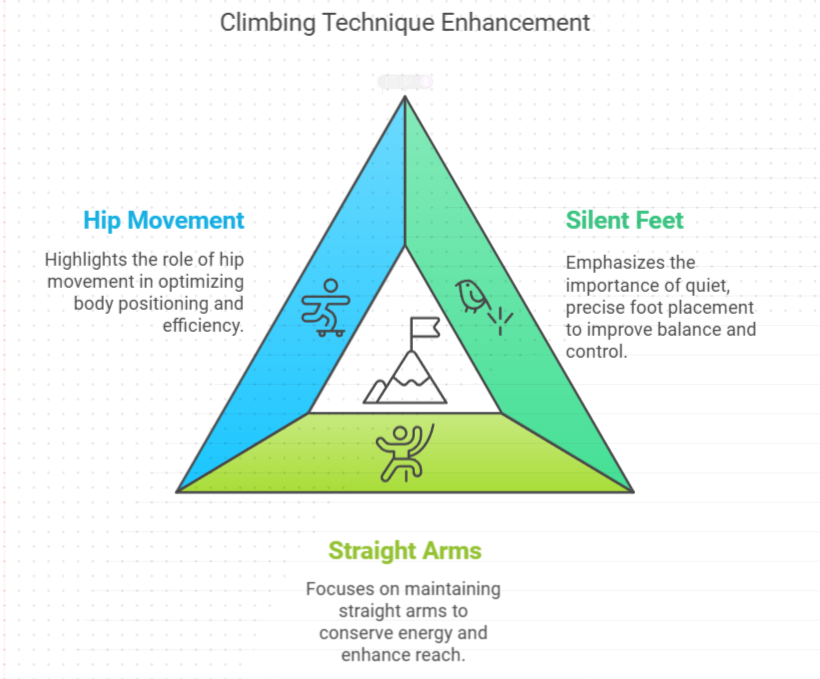
Here’s a practice tip that transformed my teaching: start each climbing session with “movement drills” on easy routes. I have my students climb the same easy route three times:
- First time: Focus on silent feet
- Second time: Straight arms only
- Third time: Hip movement and position
The beautiful thing about the climbing technique is that you never stop learning. Just last week, I watched a 12-year-old on my youth team teach me a new way to approach a tricky balance move. That’s what I love about this sport—there’s always room to grow and improve.
Remember what I tell my students: “Technique beats strength every time.” You don’t need to be able to do twenty pull-ups to be a good climber. You need patience, body awareness, and a willingness to look silly while you’re learning. Trust me, we’ve all been there!
And please, don’t get discouraged if you’re not progressing as fast as you’d like. Good technique takes time to develop. Focus on making each movement deliberate and precise. As we say in my classes, “Practice doesn’t make perfect – practice makes permanent.” So, let’s make sure we’re practicing the right things!
Building Your First Climbing Session
You know what makes me cringe every time I see it? Watching someone walk straight into the gym, grab their shoes, and immediately jump on the most challenging route they can find. After throwing out my shoulder doing precisely that in my early days, I learned the hard way that a proper climbing session needs structure. Let me share how I now teach my students to build the perfect climbing workout.
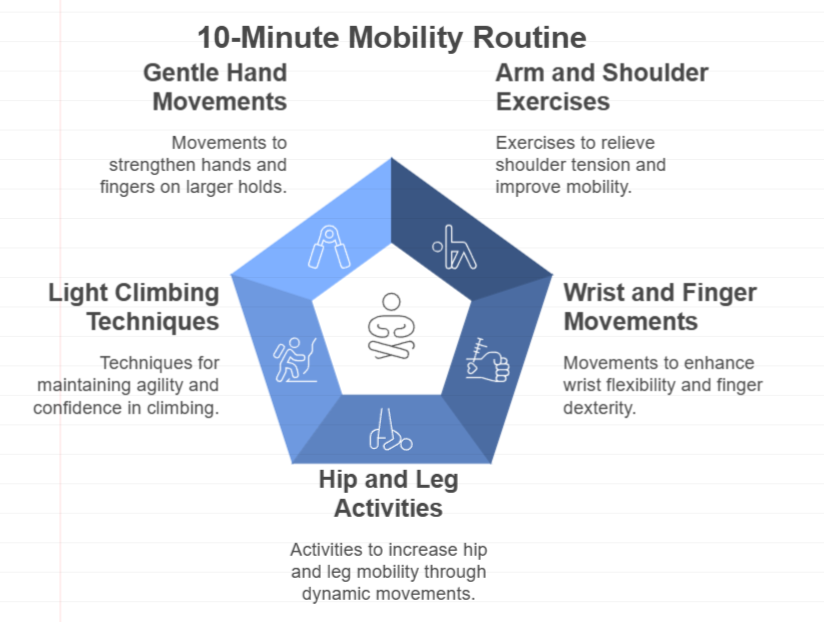
First things first – the warm-up is non-negotiable, folks! I don’t care if you’re running late or “feeling great today.” Your tendons and muscles need to wake up gradually. I start all my sessions with what I call the “10-minute mobility routine”:
- Arm circles and shoulder rolls (goodbye, shoulder tension!)
- Wrist rotations and finger stretches
- Hip circles and leg swings
- Light traverse on easy holds (staying below 3 feet)
- Gentle hand and finger movements on larger holds
When I first learned this, I was shocked: your fingers have no muscles! They’re controlled by muscles in your forearms. That’s why proper warming up is crucial—those tendons need time to get ready for action. Trust me, finger injuries are no joke and can take months to heal.
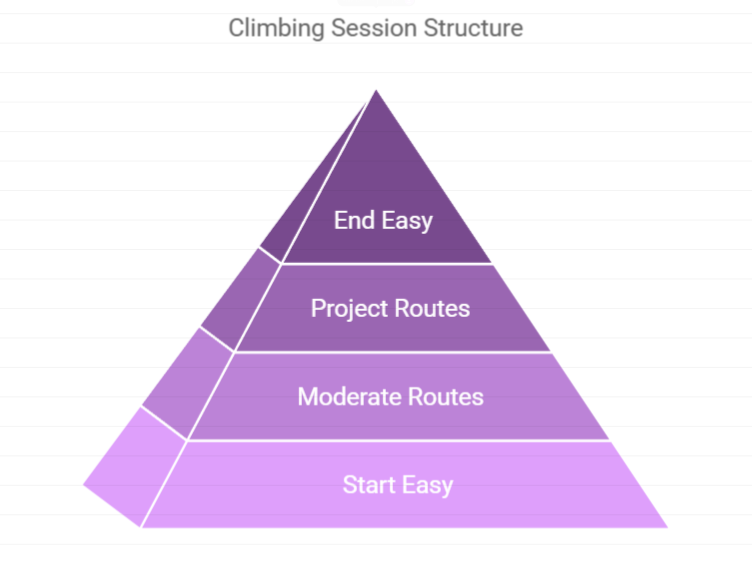
Now, let’s talk about structuring your actual climbing session. I use the “pyramid approach” with all my beginners:
- Start with 3-4 super easy routes (way below your max level)
- Gradually work up to moderately challenging routes
- Try your “project” routes (the hard stuff) when you’re properly warmed up
- End with easier routes as you get tired
One of my students taught me a brilliant way to time rest periods—she uses her favorite songs! Instead of staring at a clock, she knows that two songs (about 6-8 minutes) are perfect rest time between challenging routes. Whatever works for you, just make sure you’re resting. I see too many people hanging out by the wall, subconsciously doing micro-movements that prevent proper recovery.
Speaking of rest, here’s my “hand check” test: if you can’t fully open and close your fingers without feeling significant fatigue, you need more rest. Period. No arguments! I learned this from a veteran climber after I’d been overtraining for weeks and wondered why I wasn’t improving.
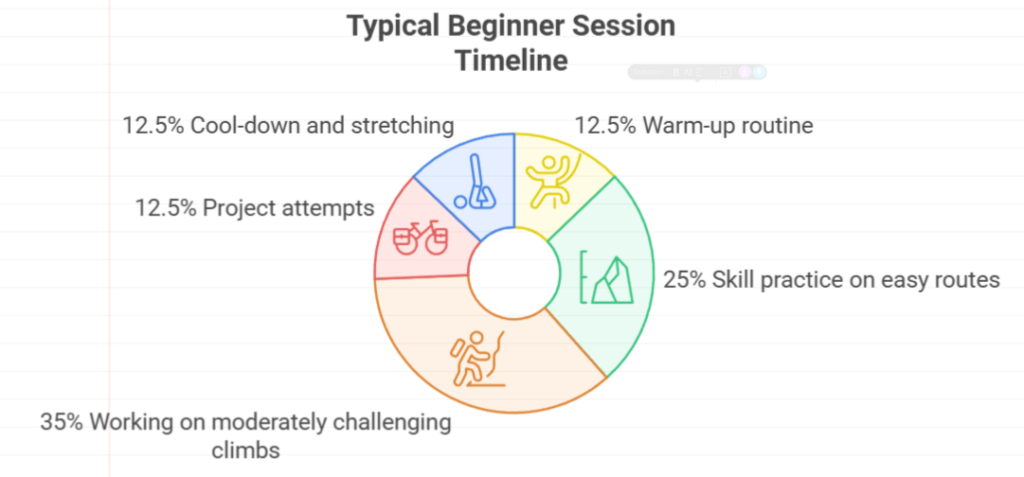
Let me share a typical beginner session timeline that I use with my students:
- 10-15 minutes: Warm-up routine
- 20-30 minutes: Skill practice on easy routes
- 30-40 minutes: Working on moderately challenging climbs
- 15-20 minutes: Project attempts (if energy allows)
- 10-15 minutes: Cool-down and stretching
Hydration is super important, too! I keep a water bottle with marks showing how much I should drink every hour. Dehydration can sneak up on you in a climate-controlled gym – you might not feel sweaty, but trust me, you’re working hard!
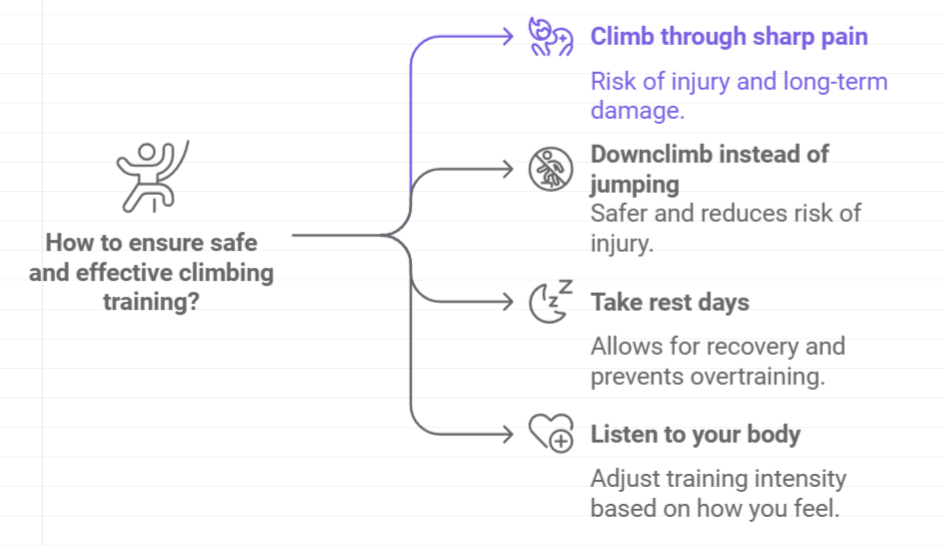
Now, about preventing injuries (something I’m passionate about after my own early mishaps). Here are my non-negotiable rules:
- Never climb through sharp pain (dull muscle fatigue is okay)
- Always downclimb when possible instead of jumping
- Take at least one full rest day between sessions as a beginner
- Listen to your body – some days you just need to take it easy
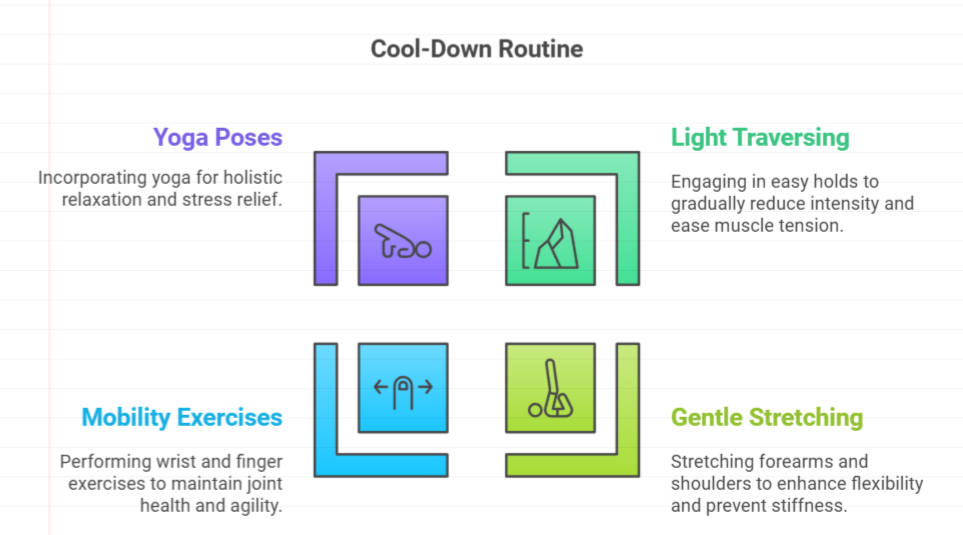
The cool-down is just as important as the warm-up, but I’ll be honest – I used to skip it all the time. Then I noticed my fingers would be stiff as boards the next day. Now I always end with:
- Light traversing on easy holds
- Gentle stretching for forearms and shoulders
- Wrist and finger mobility exercises
- Some basic yoga poses for full-body relaxation
Here’s a pro tip that took me years to learn: keep a climbing journal! Note how you feel before and after sessions, what worked well, and what didn’t. This helps you spot patterns and avoid overtraining. One of my adult students uses their phone’s notes app to track everything, and their progress has been remarkable!
Remember what I tell every new climber in my gym: “Your first month of climbing isn’t about getting stronger – it’s about learning to listen to your body.” Some days, you’ll feel like Spider-Man; others, you’ll barely want to leave the ground. Both are normal!
And please, don’t feel wrong about ending your session early if you’re tired. Too many people push through fatigue and have tweaked fingers or shoulders. The wall will still be there tomorrow, I promise! As we say in my advanced classes: “The best climber is the one who can climb again tomorrow.”
Indoor Climbing Etiquette and Community
Let me tell you about my most embarrassing moment as a new climber: I was so focused on my climbing that I walked under someone working on a challenging boulder problem. They had to abort their attempt mid-move, and boy, did I get some looks! That’s when I realized that climbing isn’t just about physical skills – it’s about being part of a community that looks out for each other.
First, let’s discuss the unwritten rules that make everyone’s session better. The biggest one? Don’t be a “spray lord” (that’s climbing speak for someone who gives unwanted advice). I had to learn this one the hard way after enthusiastically “helping” everyone within earshot. Now, I follow the golden rule: unless someone’s about to do something unsafe or specifically asks for help, keep the tips to yourself.
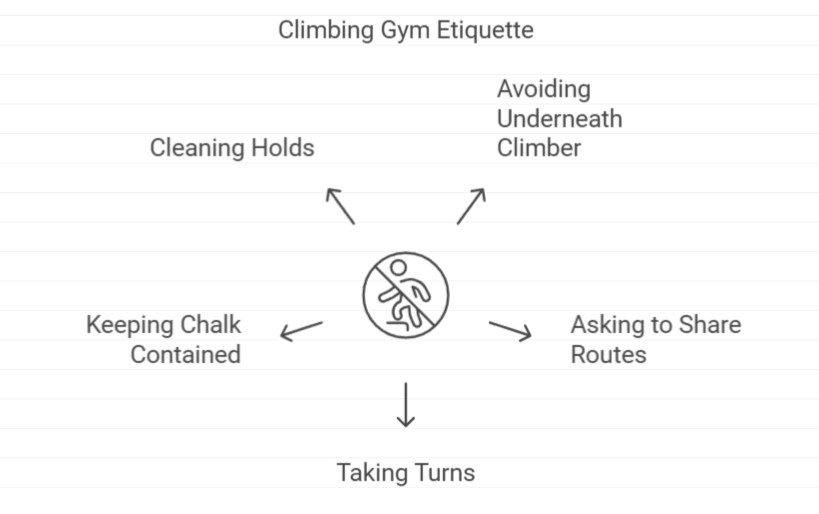
Here’s my “Top 5 Gym Etiquette Essentials” that I share with all my newbies:
- Never walk underneath someone who’s climbing (yes, even if you think you’re being quick!)
- Ask “Mind if I work this problem too?” before jumping on someone else’s route
- Don’t hog the wall – take turns and share popular routes
- Keep your chalk in your chalk bag, not all over the floor
- Use a brush to clean holds after your session (especially if you’re a heavy chalk user!)
Speaking of sharing space, this beautiful dance happens in a busy climbing gym. I teach my students the “climbing bubble” concept – imagine everyone has a 6-foot sphere around them while they’re on the wall. If you wouldn’t want someone in your bubble while climbing, don’t enter someone else’s!
Let me share something that changed my whole climbing experience: finding a consistent climbing partner. I was terrible at this at first—too shy to ask people to belay me. Then, one day, an experienced climber asked me to be their partner, and it completely changed my perspective. Remember: everyone needs a belay partner, even the pros!
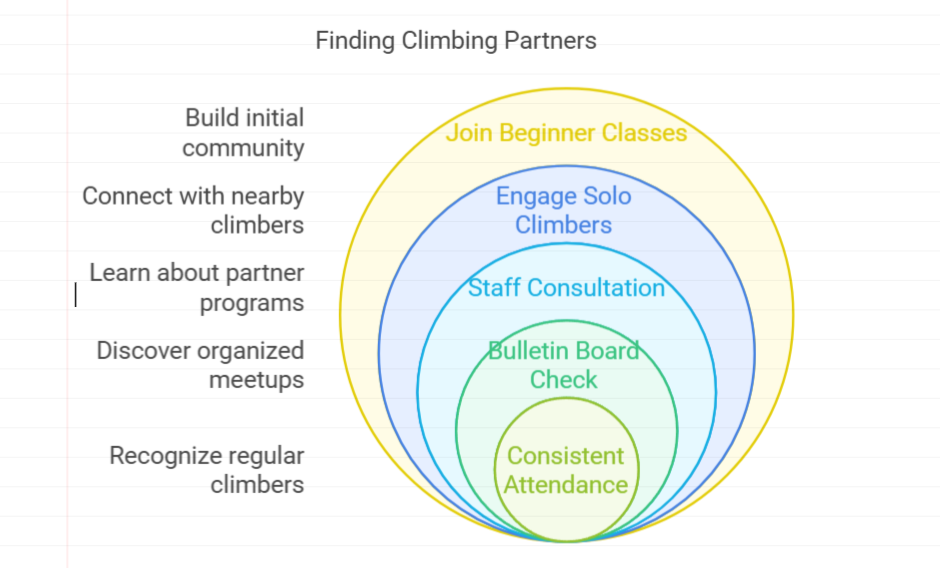
Here’s how I suggest finding climbing partners (tested and proven with my students):
- Join a gym’s beginner classes – instant community!
- Look for other solo climbers warming up near you
- Ask the staff if they know of any partner-finding programs
- Check the gym’s bulletin board for climbing meetups
- Show up at the same time consistently – you’ll start recognizing “regulars”
One of my favorite success stories is about a super introverted student who loves climbing. I suggested she wear a “Partner Wanted” pin that our gym provides. Within a week, she had three regular climbing partners! Most gyms have some version of this system – don’t be afraid to use it.
Let’s talk about climbing groups because this is where the magic happens. When I first joined a beginner’s climbing group, I thought it would be about learning techniques. Instead, I found my core climbing crew – people who celebrate your wins and help you puzzle through challenging routes. Most gyms offer:
- Structured beginner classes
- Weekly social climbing nights
- Technique workshops
- Women’s climbing groups
- Youth programs
Something extraordinary about the climbing community still amazes me: the better you get, the more you want to help others improve. I’ve seen crusher climbers working V10s stop mid-session to offer a quick spot to a nervous newcomer. That’s just how we roll!
The social aspect of climbing is what keeps many people coming back. One of my students calls it “the world’s most supportive workout group,” and I couldn’t agree more. Where else can you fail repeatedly at something and have strangers cheer you on?
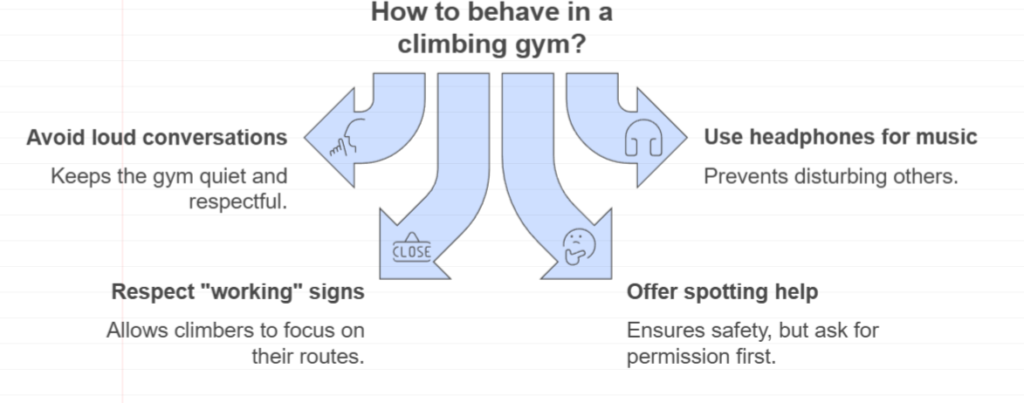
Some practical tips for being a good climbing citizen:
- Keep your conversations away from the climbing walls
- Use headphones if you want to listen to music
- Respect “working” signs on routes
- Help spot others if they look like they want it (but ask first!)
- Share beta (climbing tips) only when asked
And here’s my favorite advice for newcomers: don’t be afraid to celebrate! Did you finish your first V1? Top out on your first lead climb? Let out a victory, whoop! The climbing community loves celebrating victories, big and small. I still remember the entire gym cheering when one of my adult students conquered her fear of heights and made it to the top of her first wall.
Remember what I always tell my new students: “In climbing, we’re all working on our projects, but we’re in it together.” Whether working on your first 5.6 or projecting a V10, you’re part of this fantastic community. Just remember to brush the holds when you’re done, okay? We’re supportive, but we’re not your mom!
And please, don’t feel like you need to be at a certain level to join social aspects. Some of my best climbing friendships started when I could barely climb the most accessible routes in the gym. Climbers care way more about your attitude than your ability level. Bring good vibes, respect the space, and you’ll find your climbing family in no time!
Conclusion
Ready to chalk up those hands and start your climbing journey? Remember, every expert climber started precisely where you are now! Focus on mastering the basics, stay consistent with your practice, and don’t hesitate to ask for help from more experienced climbers – this community is incredibly welcoming to newcomers. Now, get out there and conquer your first wall!